Total Pageviews

Wednesday, April 21, 2010

Q-Tip # 6

As a rule, I don't like shiny plastic/polymer clay. But sometimes for artistic reasons,I like to contrast shiny with matte or textured. Also,it can highlight the 3-dimensional possibilities of metallic clays. I gave a glassy sheen to the last book I assembled; it really pops out with a little shine.

En général, je n'aime pas les choses qui brillent; mais parfois pour des raisons artistiques j'aime les contrastes entre brillant/mat ou brillant/texturé. Le brillant fait aussi ressortir l'aspect 3-d des pâtes métallisées. C'est pourquoi j'ai appliqué des couches de cire liquide au dernier livre que j'ai assemblé.


TIP Before applying gloss to the surface, sanding and polishing are "de rigueur". My tip is in the application of of the coats of liquid wax. I use a Q-tip! I pour a little amount of Future into a jar dip in the Q-tip and twirll it around the top of the container to get most of the liquid wax off of the cotton swab.

TRUC Avant d'appliquer une couche de cire à une surface, il faut poncer et polir, comme de raison. Pour appliquer mes couches de cire, j'utilise une tige de coton (Q-tip). Je verse une petite quantité de cire liquide (au Canada, Future) dans un petit bocal; j'y plonge la tige de coton que fais ensuite rouler sur le bord pour enlever le surplus de liquide.


I learned that it is preferable to work with thin layers rather than one big honking thick one!! With one coat, you will get a satiny finish and with two or three layers, it will get glossier. Naturally, you let each coat dry between applications; drying time is quick because the coating is thin (a few minutes at most). With the Q-tip method, you can control where you want to apply the gloss with precision. And hey... you won't have to clean a paint brush!

Au fil du temps, j'ai appris qu'il est préférable d'appliquer de fines couches plutôt qu'une seule couche épaisse. On peut mieux contrôler le facteur brillant: une couche donne une surface satinée et avec l'ajout d'autres couches, ça devient plus brillant. Il faut laisser sécher entre les couches (quelques minutes au plus pcq les couches sont minces). Avec la méthode tige de coton, on peut appliquer précisément là où l'on veut. Pis à part de ça, pas besoin de nettoyer son pinceau!


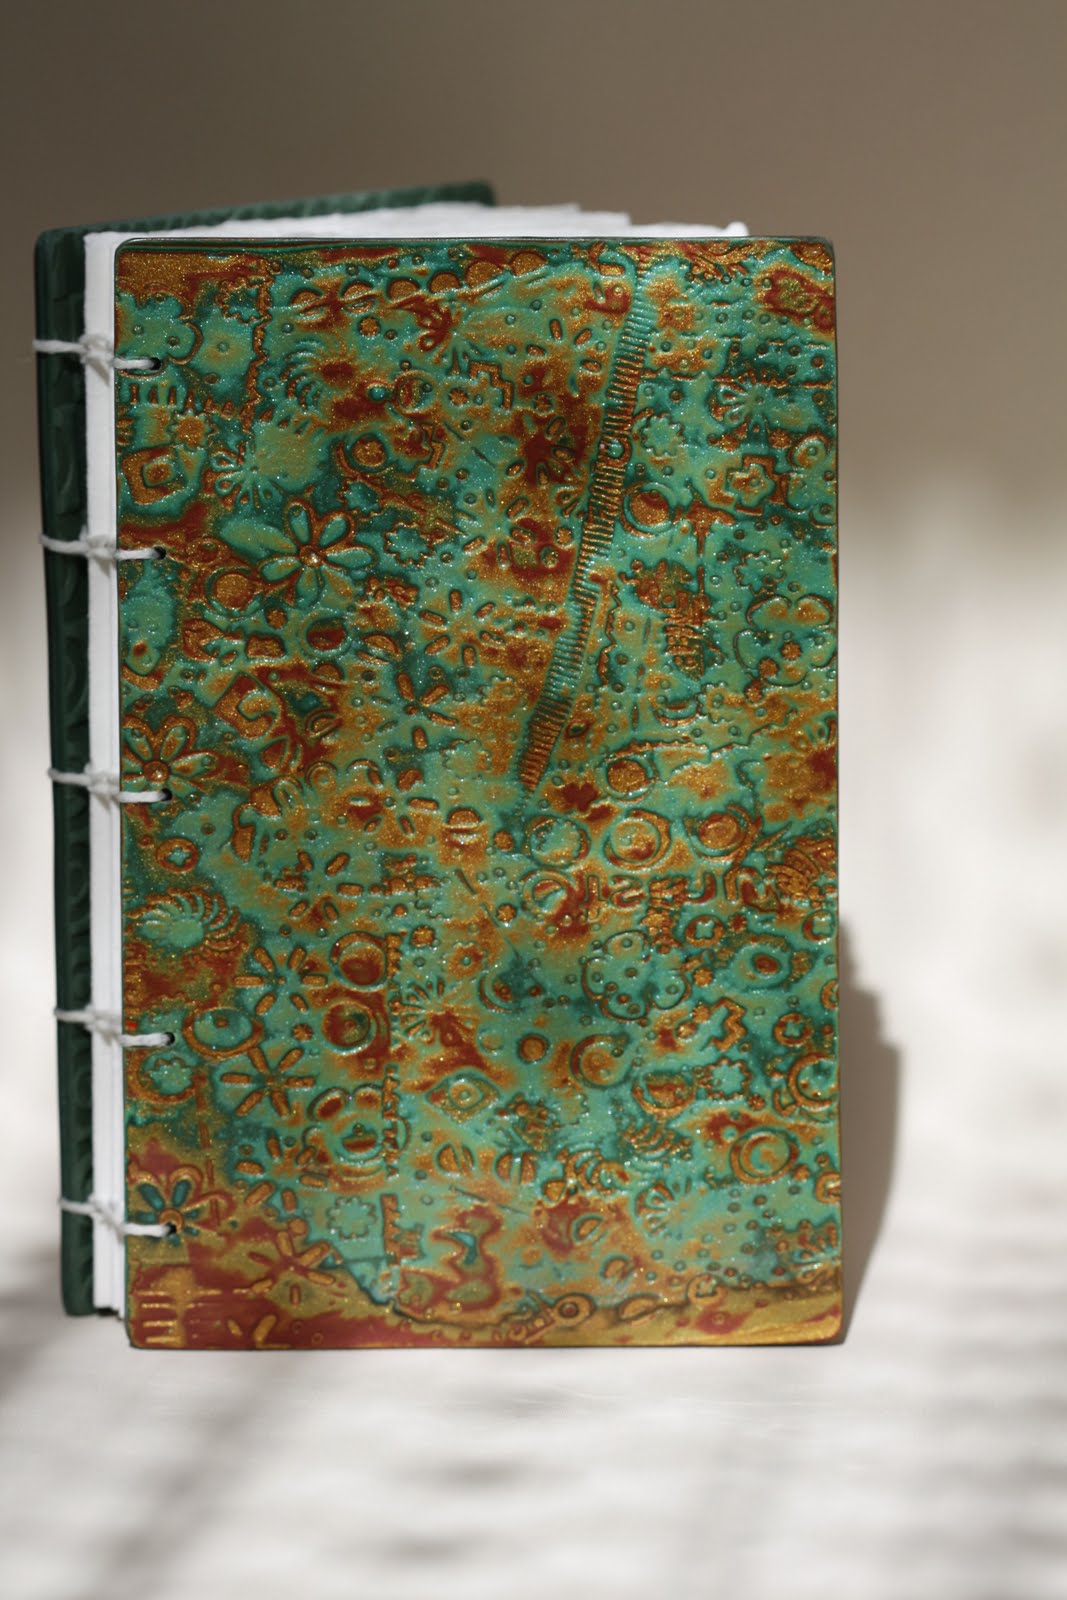
I wanted to take a picture to show the glossy finish but... not easy. So I thought a close-up would show the 3-D effect of the mokume gane.

Je voulais prendre une photo pour montrer le fini brillant mais.... pas facile! J'ai donc pensé qu'une photo prise de près ferait ressortir l'aspect 3-D de ma surface lisse.


And at a closer range, you can see the shiny mica flakes (this in another mokume gane that I like). Click on the picture!

Et une photo encore plus rapprochée (d'une autre surface) montre les petits flocons ce mica qui brillent. (cliquez sur la photo)!

Voilà!

Friday, April 9, 2010

Timelines?

It took me about two minutes to make these images! I used the polymer clay "fish-in-the-attic" tiles as a starting point.

Passage du temps!!
Ça m'a pris environ deux minutes pour assembler ces images; j'ai utilisé les tuiles "poisson-dans-le-grenier" comme point de départ.


It took me at least two days to make this polymer clay mosaic!!! Made it in 1998.
Ça m'a pris au moins deux jours pour assembler cette mosaique (en 1998).


9.5 x 15 cm

Friday, April 2, 2010

There was a fish in the attic

Il y avait un poisson dans mon grenier


Hope your weather is fine for the holidays. Here we are breaking all records for... well, it is summer here!!

Je vous souhaite du beau temps pour les vacances de Pâques. Ici nous fracassons les records de chaleur!!

Thursday, April 1, 2010

Celtic knots

My French friends love to set up challenges. This one (make something inspired by the Celts) caught my attention. I always wondered if there was a trick to drawing these knots. Googled it and found a video that taught me. If you have a minute, click on the link and try it, it's a lot of fun.
Once I was comfortable drawing the knots it was time to try my hand at carving them. Baked a thick sheet of clay and got out my tools and started whittling away. Enjoyed the process, listened to a lot of music. Time flew.

Mes amies françaises aiment proposer des défis. Ce défi en particulier (s'inspirer des celtes) a attiré mon attention. Je me suis toujours demandée s'il y avait un truc à dessiner les noeuds celtes: eh bien oui, il y en a un. Je l'ai trouvé à l'aide de Google: un vidéo m'a expliqué comment faire. Si vous avez une minute, essayez-le.
Une fois le dessin un peu maîtrisé, je voulais essayer un bas-relief. Sorti mes outils et sculpté. Procédé agréable; écouté de la musique. Le temps s'est envolé!


Finished my book, put in some nice paper for drawing/painting/sketching/writing, whatever. If you want to see the challenge results, you will find them in Parole de pâte. Awesome ideas.

J'en ai fait une couverture de livre que j'ai fabriqué avec un beau papier pour dessiner/peindre/écrire. Si vous voulez voir ce que les autres ont fait avec ce défi, allez voir sur Parole de pâte. Idées géniales.


Made the textured back cover with bits and pieces and whatever caught my eye at that moment.
J'ai fabriqué le dos du livre avec des gugusses qui trainaient ici et là.


Voilà!

LinkWithin

Related Posts with Thumbnails