Les trente autres trucs sont en quelque part dans ma tête.
This one is all about shaving off thin slivers of clay from a sheet of clay.
You can use this tip for the mokume gane or the mica shift techniques.
For making a mokume gane, you usually stack up different colours of clay laminate them into one sheet and then make an impression upon this sheet with a texture or other texturing tools. As for the mica shift, you use a metallic clay (gold works best for me) and impress textures on the clay sheet.
To get the mokume gane effect, you have to shave off a very thin layer of clay and the colours in the underlying layers will appear. For the mica shift, I think that breaking the surface tension will bring out the mica shift effect (or 3-d or hidden image) to the surface. I love playing around with both of these techniques.
J'utilise ce truc avec le mokume gane ou pour faire ressortir les images cachées quand on imprime une texture sur une feuille de pâte métallisée.
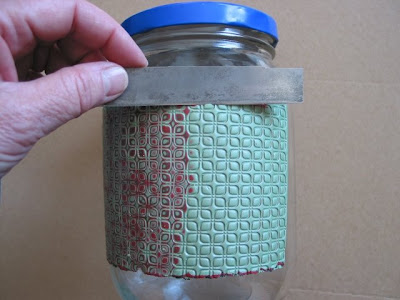
Now for the tip which works for me. Instead of curving your blade to do the shaving of thin slivers, I like to curve the polymer clay sheet and use a straight blade. To give my clay sheet a gentle curve, I place it on a large jar (or it could be an ice cream container). Why do I like this method?: it is because the curve is always the same, and which makes the shaving part more precise and easy: more control in the shaving process. Here is a picture of my usual set up. I usually use both hands to hold my blade but my other one was taking a picture....
Au lieu de recourber la lame pour enlever une tranche minime de pâte à la surface, (les courbures de la lame ne sont pas toujours pareilles et parfois une mini fausse manoeuvre a pour résultat qu'on a trop pris de pâte, je préfère donner une légère courbure à la pâte.

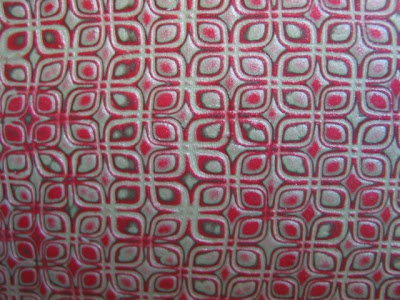
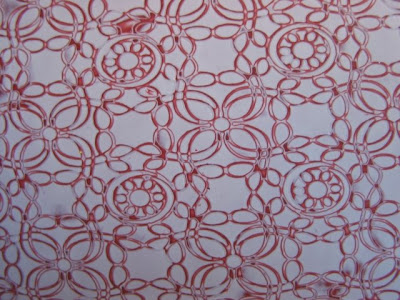
And this is what you get:
Ce qui donne ceci:

Presently, I am working on book covers for a class that I will be giving at our annual polymer clay gathering in Morrisburg Ontario and I need samples of different stages of completion. I have been playing around with the layering/texturing technique which gave me the idea to share this tip.
C'est en préparant mon cours d'assemblage de livre que m'est venue l'idée de partager ce truc car récemment j'ai travaillé ces techniques.

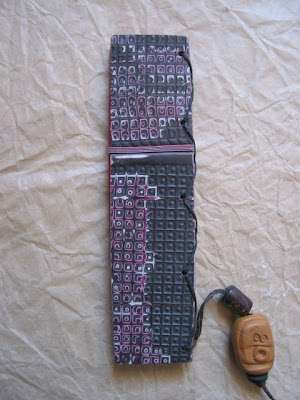
It is possible to be more creative with this and bring it to another level. On the back cover of the blade holder below, I played around with the texture and the result after it was shaved. Many possibilities lurking around the corner don't you think?
Il est possible de pousser la créativité encore plus loin en combinant la texture originale avec le résultat de la découpe. C'est ce que j'ai fait sur le couvercle d'un porte-lames. Qui sait, vous aurez peut-être le goût d'explorer!!!

Who knows, you might take it yet to another level!!!

7 comments:
C'est effectivement une très bonne idée (tant la bouteille pour la découpe que ne pas tout découper)
Un bien beau résultat sur une texture à priori simple...
Toujours en recherche et comme tu es genereuse nous on apprend plus vite!!! Merci!
résultats spectaculaires!! ça m'inspire pour ma prochaine couverture de livre fimo!! merci!
Hello Violette!
Thanks for this good tip! I´ll try it. You make nice thing from polymerclay.
Ciao Petra
Great idea. I always have trouble slicing it even and thin enough. I think this just might solve my problem.
Merci.
Hey Vio- what an inspired approach!
xo
g
Bonne Idee! C'est magnifique!
Post a Comment